

without taking a lot of time, money or skills. Come on…do it for yourself & your neighbors!
#1 Enhance with (Tough) Edging

Tell your grass who’s boss with edging that can stand up to even the crabbiest of all crabgrasses. But don’t make the mistake that many homeowners make of buying the flexible plastic edging. You may think think it will be easier to install. But, it could look cheap, less attractive and amateur. Worse, it won’t last. And before you know it, you won’t be able to tell where your garden bed ends and your “lawn” begins. Instead buy the more rigid, tough edging in either fiberglass, aluminum, or steel.
Tips on installing edging:
Lay out a hose in the pattern you want.
Sprinkle flour or powdered chalk to mark the hose pattern.
Use a lawn edger (or spade) to make an incision for the edging.
Tap the edging into the incision with a rubber mallet.
Super Look with using mostly your time and up to $3.50 a square foot for the edging.
#2 Create a Focal Point with a Berm
A berm is a mound of gently sloping earth, often created to help with drainage. You can also build them to create “island beds,” a focal point of textures and colors that are so much more interesting than plain ol’ green grass. The positives of creating a berm; they could give you privacy, diffuse street noises, and provide shade.

For most yards, berms should max out at 2-feet high because of the space needed to properly build one. They need a ratio of 4-6 feet of width for every foot of height. That’s at least 8 feet for a typical 2-foot high berm. Double check to make sure you have the enough room or decrease the height of your berm.
Popular berm plantings include:
Flowering bushes, such as azaleas
Evergreens, such as blue spruce
Perennials like, periwinkle, perennial sage, “April Night?
Tall swaying prairie grasses
Mulch heavily to keep the weeds away
Super Look for $300.00 or less. This would depend on the size of berm you want and how much soil you need to get to your desired height and most important, the plants you choose.
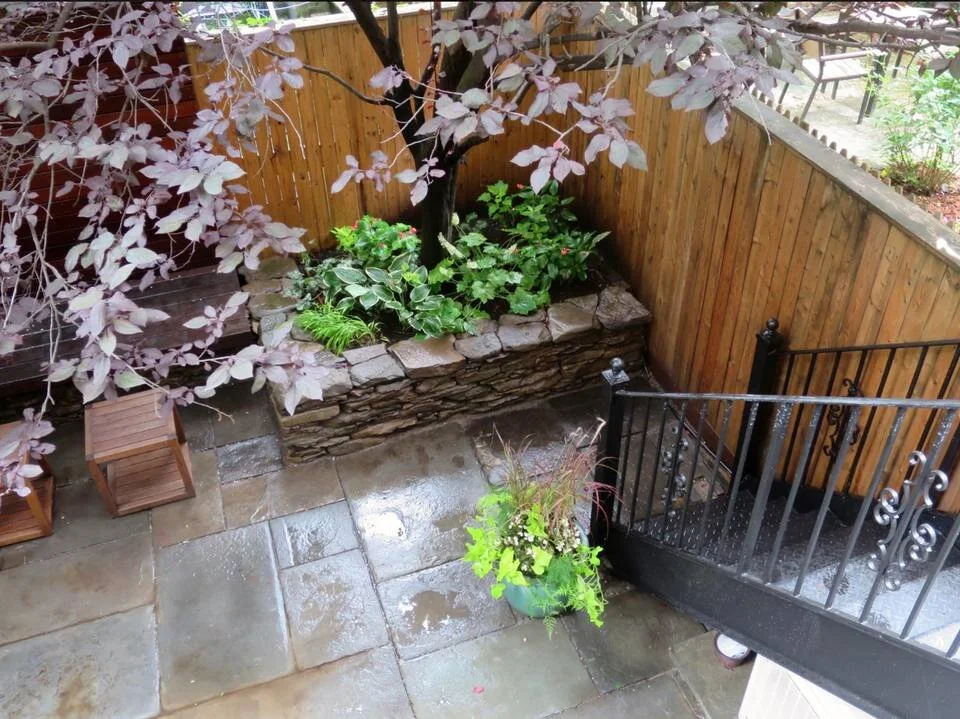
#3 Make a Flagstone Wall
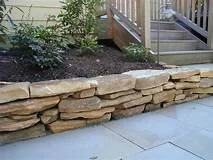
Build a flagstone wall 12 inches tall and it becomes a super simple
DIY project with no mortar needed at all. This is a very doable project!
How to build an easy flagstone wall:
Dig a trench a couple of inches deep and wide enough to accommodate the flagstones.
Fill with pea gravel and/or sand and tamp to make level.
Lay out the flagstones to see their shapes and sizes.
Stack the smaller stones first.
Save the largest, prettiest flagstones for the top layer.
Backfill with gravel.
Choose a stone of consistent thickness like flagstone, limestone, sandstone, shale. It can be any rock that splits into slabs.
The cost? About $300 for stones and sand (a ton of 2-inch-thick stone is enough for a wall 10 feet long and 12 inches high). Also, check on Craigslist free items, FBook marketplace and online FREE sites. There is always items of this kind posted for free, you just pick up!
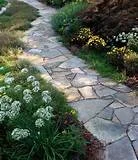
#4 Install a Path with Flagstone or Gravel
There’s something romantic, charming, and simply welcoming about a meandering pathway to your front door or back garden — which means it has super-huge impact when it comes to your home’s curb appeal.
You can use flagstone, pea gravel, decomposed or crushed granite, even poured concrete (although that’s not easy to DIY).
A few tips for building a pathway.
Allow 3 feet of width for clearance.
Create curves rather than straight lines for a pleasing effect.
Remove sod at least 3 to 4in deep to keep grass from coming back.
If you live in an area with heavy rains, opt for large, heavy stones.
The cost? Depending on the material you use and the area, approximately $200-$500. Decomposed granite is usually the least expensive and flagstone the most $$ but, the easiest to install.
#5 Build a Tree Surround
Installing a masonry surround for a tree is a two tier project: It looks great and it means you’ve got less to mow. Also, adding a bench for seating will add another dimension to this project. Extra seating is always a good thing!
All it takes is digging a circular trench, adding some sand, and installing brick, cement blocks, or stone. Just go for whatever look you like best.
The biggest challenge is getting an even circle around the tree.
Here’s a tip;
Tie a rope around the tree making a loop big enough so that when you pull it taunt against the tree, the outer edge of the loop is right where you want the surround to be.
Set your spade inside the loop with the handle straight up and down. As you move around the tree, the loop of rope keeps the spade exactly the same distance from the base of the tree which creates a nice circle.
Building the tree surround:
Dig out a circular trench about 8 inches deep and 6 inches wide.
Add a layer of sand.
Set bricks at an angle for a saw-tooth effect or lay them end-to-end.
Fill the surround with 2 to 3 inches of mulch.
The cost? Less than $25 if you use very inexpensive using common pavers & stones that are available.

ARTICLE adapted from the National Association of Realtors content website for realtors.
